
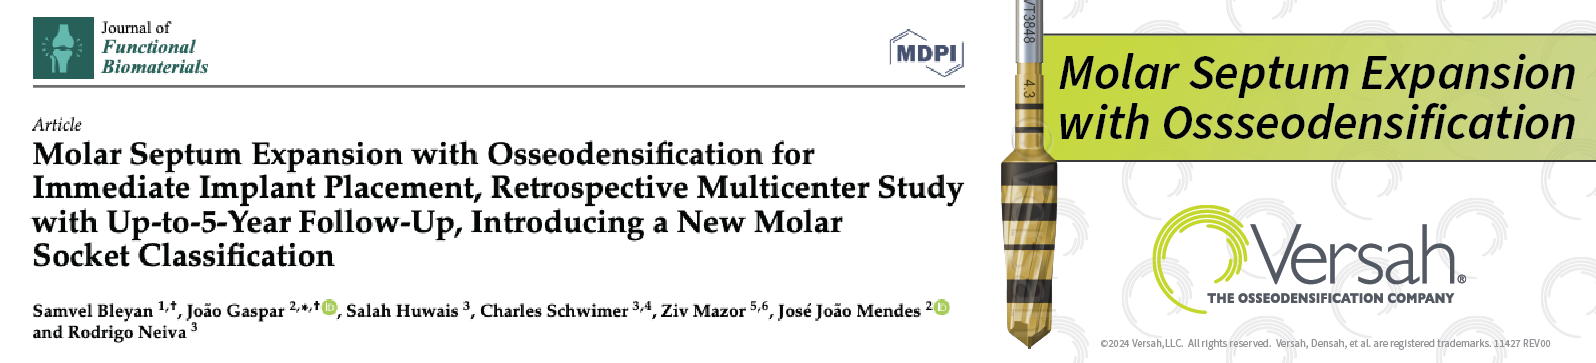
Molar Septum Expansion Protocol with the Densah® Burs
Step 1:
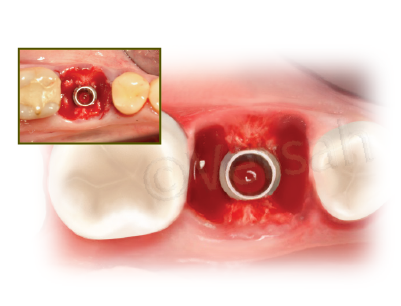
Separate molar roots at the furcation without compromising the integrity of the septum. Perform atraumatic mesial and distal root extraction. Degranulate tissue to expose septum area.
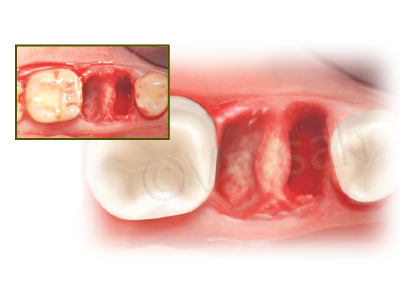
Step 2:
Use a pilot drill that is 1.3 mm -1.5 mm, in clockwise mode, in the center of the septum to a depth that is 1 mm deeper than the planned implant length.
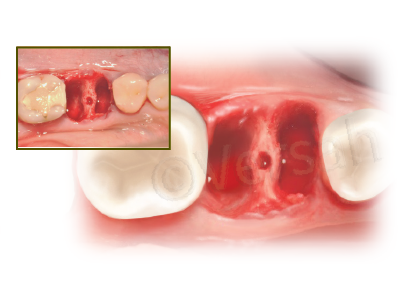
Step 3:
Depending upon the implant type and diameter, follow the corresponding Implant System Drilling Protocol starting with the smallest Densah® Bur to 1 mm deeper than the intended implant length. Run the Densah® Burs in OD mode (counterclockwise, drill speed 1000 rpm with copious irrigation). Use the subsequent Densah® Burs in smaller increments to increase bone plasticity and to expand the osteotomy. For example, use Densah® Bur (2.0) after the pilot then expand with Densah® Bur (2.3) then move to Densah® Bur (2.5) before introducing the Densah® Bur (3.0). As it is in ridge expansion cases with Osseodensification, you may over-expand the osteotomy so the last Densah® Bur diameter is slightly larger than the planned implant major diameter. As the bur diameter increases, the bone expands to reach the final osteotomy diameter.
Step 4:
Implant placement should be either at the crest level or sub-crest level depending on its connection type.
Step 5:
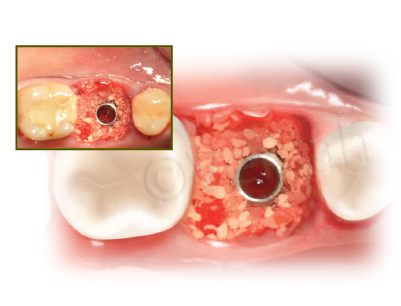
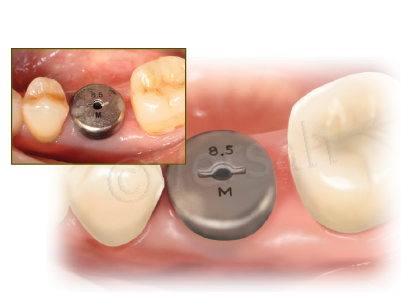
Fill the gap with a bone graft material if needed; preferably an allograft with a 70/30 cancellous/cortical ratio. Seal the gap with biologics or a collagen plug and a large healing abutment and possibly place interrupted suture on top.
Step 6:
Assess healing and soft tissue closure 6-8 weeks post placement.
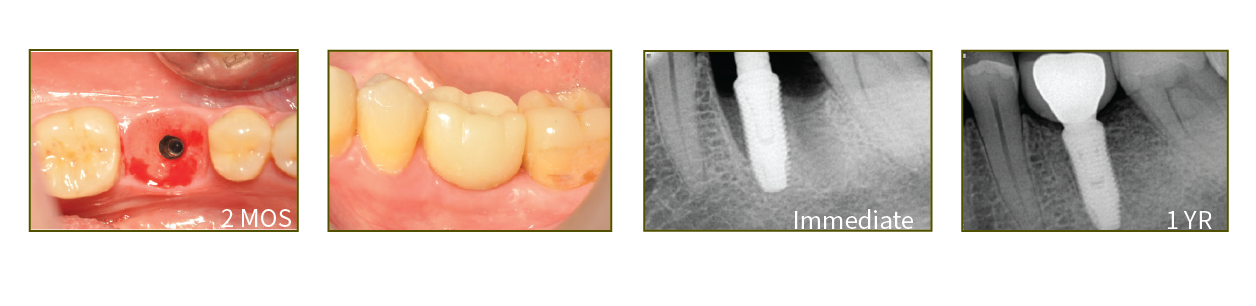
Case courtesy of Dr. Samvel Bleyan
* Data on file, visit ../our-science/ versah.com/our-science/ for Molar Septum Expansion studies
** Clinician judgement and experience should be applied in conjunction with this clinical practice suggestive use protocol
10520 REV05 3/2026