
Guided Expansion Graft
• USE PILOT DRILL IN (CW) MODE AND DRILL TO IMPLANT DEPTH AND ANGULATION
• USE THE SUBSEQUENT DENSAH® BURS IN SMALLER INCREMENTS TO EXPAND THE OSTEOTOMY AND TO INCREASE BONE PLASTICITY
• FINAL EXPANSION DIAMETER SHOULD NOT EXCEED THE PLUS ONE FORMULA (INITIAL RIDGE WIDTH + 1 MM)
• GRAFT THE NEWLY FORMED SOCKET WITH A 70/30 CANCELLOUS/CORTICAL COMBINATION ALLOGRAFT
• ALLOW HEALING FOR 3-6 MONTHS
• RE-ENTER THE SITE TO PREPARE FOR IMPLANT PLACEMENT USING OSSEODENSIFICATION WITH THE DENSAH® BURS
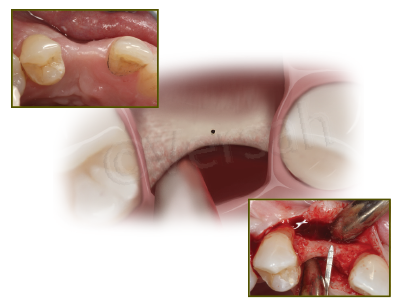
Step 1:
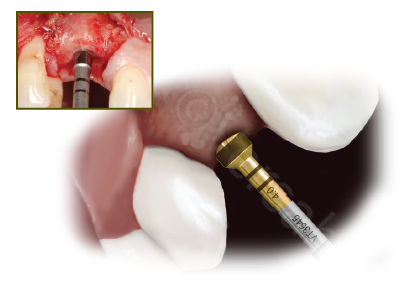
Flap the soft tissue using the technique indicated for the implant position. Drill to implant depth and angulation using a narrow Pilot Drill preferably 1.3 mm – 1.5 mm. (CW speed 1000 rpm with copious irrigation).
Step 2:
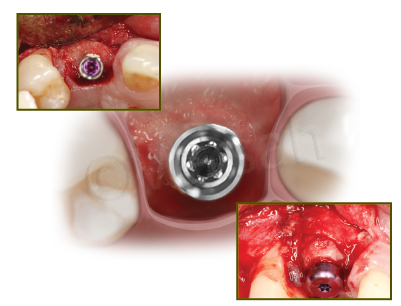
Depending upon the implant type and diameter, follow the corresponding Implant System Drilling Protocol starting with the smallest Densah® Bur to 1 mm deeper than the intended implant length. Run the Densah® Burs in OD mode (counterclockwise, drill speed 1000 rpm with copious irrigation). Use the subsequent Densah® Burs in smaller increments to increase bone plasticity and expand the osteotomy. For example, use Densah® Bur (2.0) after the pilot then expand with Densah® Bur (2.3) then move to Densah® Bur (2.5) before introducing the Densah® Bur (3.0).
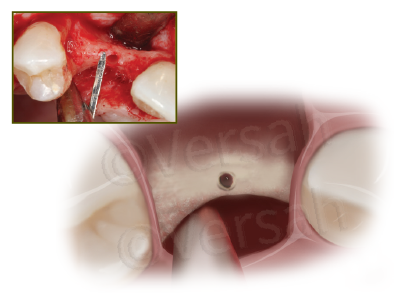
Step 3:
Increase osteotomy diameter in small increments until reaching the intended expansion. As the bur diameter increases, the bone will slowly expand to the final expansion diameter. Final expansion diameter should not exceed the plus 1 formula (initial ridge width + 1 mm). For example, if you start with a 3 mm ridge, the maximum expected final osteotomy diameter is not to exceed (3+1) = 4 mm.
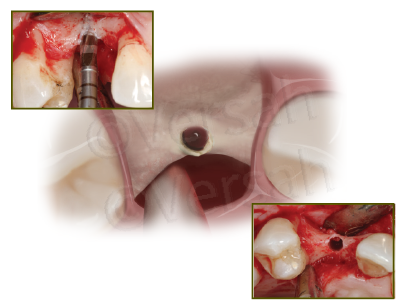
Step 4:
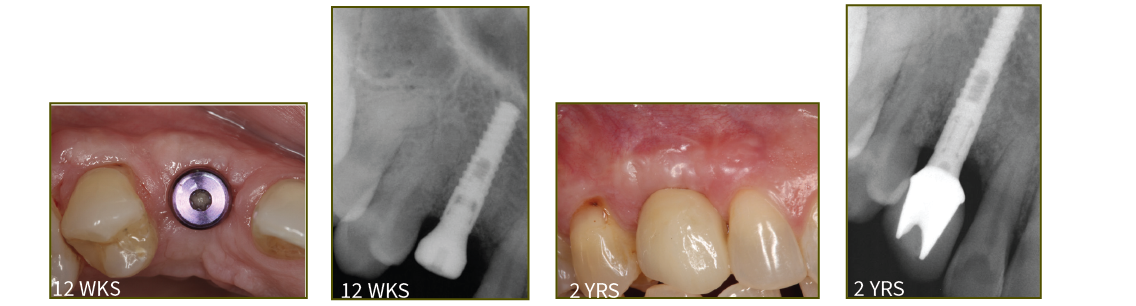
Graft the newly formed socket/osteotomy including surrounding area with your preferred bone allograft materials, preferably a 70/30 cancellous/cortical ratio. Use membrane and try to achieve tension free primary closure. Allow healing for 3-6 months.
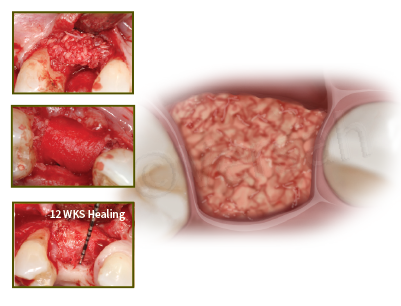
Step 5:
Re-enter the site and perform Osseodensification to facilitate further expansion if needed and place the implant. Use the Densah® Burs in smaller increments. Do not under-prep the osteotomy beyond 0.5 mm - 0.7 mm in the maxilla or 0.2 mm – 0.5 mm in the mandible.
Step 6:
If using the surgical motor to tap the implant into place, the unit may stop when reaching the placement torque maximum. Finish placing the implant to depth with a torque indicating wrench. The proper diameter implants should be included in the treatment plan and on hand at the surgical appointment.
* Data on file, visit versah.com/our-science/ for Guided Expansion Graft studies
** Clinician judgement and experience should be applied in conjunction with this clinical practice suggestive use protocol.
10521 REV05 updated: 03/2026