
Overview:
Indicated in cases with poor-quality soft tissue due to fracture and infection in post-extraction sockets in combination with severe bone loss. IDR I Protocol will be introducing a new perspective to manage these compromised sockets using flapless surgery in a simple way based on biological response.
• EXTRACT DAMAGED TOOTH AND REMOVE GRANULATION TISSUE AND REMAINS OF PERIODONTAL TISSUE.
• USE THE DENSAH BURS IN OD MODE (CCW ROTATION) TO PREPARE THE IMPLANT SITE AND DENSIFY THE BONE BED.
• ANCHOR THE IMPLANT INTO THE PALATAL WALL.
• HARVEST AND RESHAPE CORTICO-CANCELLOUS GRAFT AND PARTICULATE BONE FROM THE MAXILLARY TUBEROSITY. INSERT AND STABILIZE THE CORTICO-CANCELLOUS AND PARTICULATE GRAFT INTO THE BUCCAL ASPECT OF THE RECEPTOR SITE.
• PLACE A MANUFACTURED SCREW RETAINED PROVISIONAL RESTORATION WITH AN ADEQUATE EMERGENCE PROFILE. (CEMENTED RESTORATION MUST NOT BE UTILIZED)
• ALLOW A MINIMUM 4 MONTHS HEALING AND PLACE A SCREW RETAINED FINAL PORCELAIN CROWN.
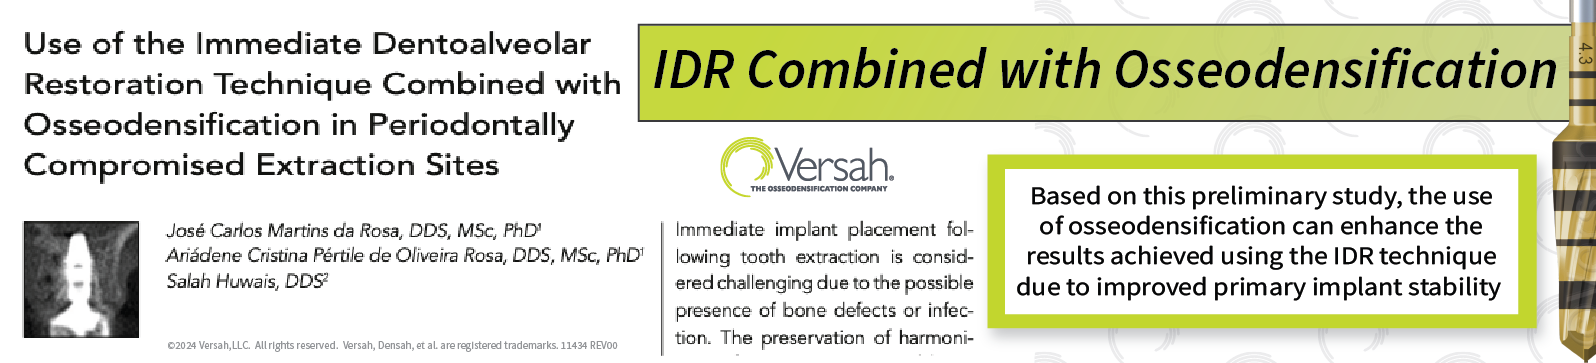
The CBCT image shows fracture and loss of the buccal bone wall.
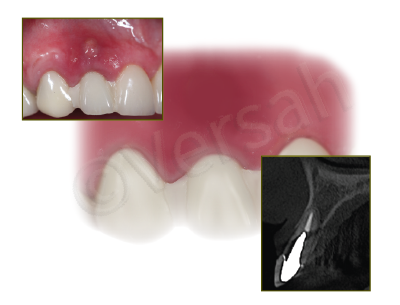
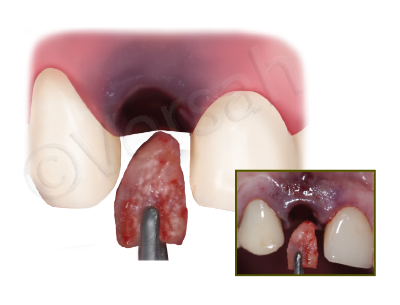
Step 1:
Extract the damaged tooth using a minimally invasive procedure. Completely remove the granulation tissue and remains of periodontal tissue by carefully using the curettage technique in the socket. Total loss of the buccal wall might be common and evident.
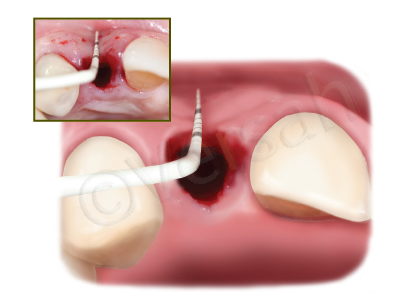
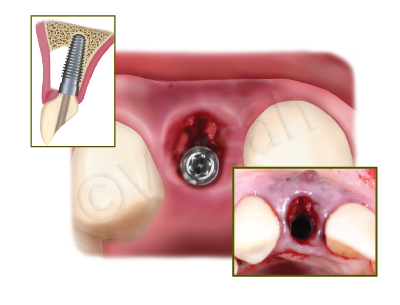
Step 2:
Use the Densah® Burs to prepare the implant site. Start with the Densah® pilot drill, in clockwise mode, to a depth related to the planned implant length. Depending upon the implant type and diameter, follow with wider Densah® Burs corresponding with the Implant System Drilling Protocol.* Starting with the smallest Densah® Bur, run the Densah® Burs in OD mode (counterclockwise, with speed 800-1500 rpm with copious irrigation).
Step 3:
Harvest cortico-cancellous graft and particulate autogenous bone from the maxillary tuberosity using IDR chisels (IDR kit). Reshape the graft according to the defect configuration. Insert and stabilize the shaped corticocancellous graft by positioning it securely into the buccal aspect of the receptor site so the marrow portion of the cortico-cancellous graft would be facing the implant.
Step 4:
Anchor the implant into the palatal wall in the 3-D position. Compact autogenous particulate bone to fully fill the gap between the marrow portion of the corticocancellous graft and the implant. 3 mm of bone thickness is a desired reconstruction goal of the buccal aspect.
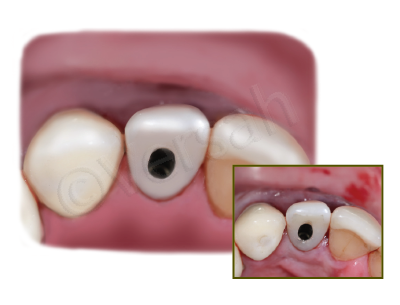
Step 5:
Place a manufactured screw retained provisional restoration with adequate emergence profile.
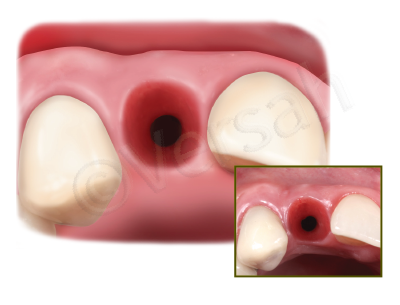
Step 6:
Allow a minimum 4 months of healing for soft tissue to become stable in volume and have adequate thickness. A screw retained final restoration is recommended. Maintenance of the anatomical contour of soft tissue can be observed.
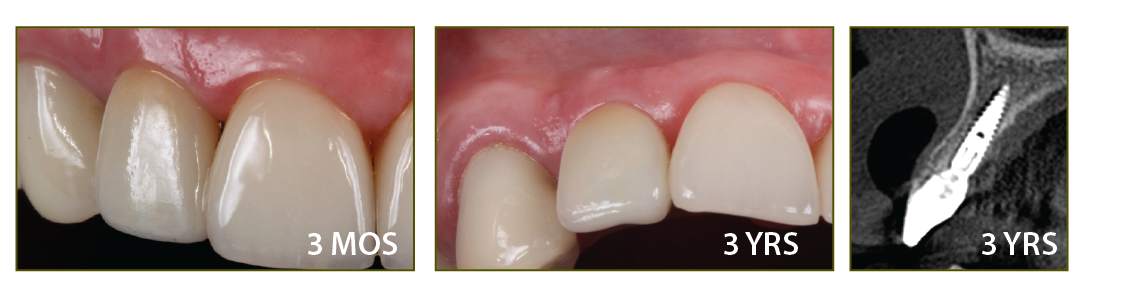
Clinical follow-up showing stability of soft tissue regarding gingival margin and papillae.
A CBCT image after 3 years highlights the stability of the buccal wall, in terms of thickness and height.
Case courtesy of Dr. José Carlos da Rosa
* Data on file, versah.com/our-science/ for studies
Clinician judgement and experience should be applied in conjunction with this clinical practice suggestive use protocol.
10522 REV03 03/2024
Case courtesy of Dr. José Carlos da Rosa